.svg)


To connect to the school Wi-Fi on your MacBook, iPhone or iPad, you need to turn off a setting called Private Wi-Fi Address. If you don't, your device won't be recognised as yours and you'll have problems connecting.
This guide shows you how to switch it off, step by step.
What is Private Wi-Fi Address?
Apple devices normally use a randomised "private" address when joining a Wi-Fi network. It's a privacy feature designed for public Wi-Fi like cafés and airports. On our school network, though, every device is registered to you using its real hardware address — so we need this feature switched off so the network can recognise your device.
For MacBooks (macOS 15 Sequoia and above)
If you're on an older version of macOS, you don't need to do anything — this feature is off by default. Check by going to the Apple menu → About This Mac.
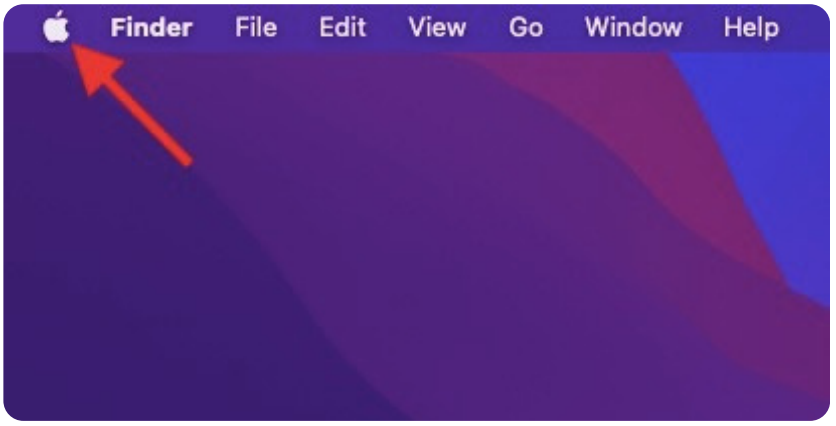
Step 1. Click the Apple menu in the top-left corner of your screen.
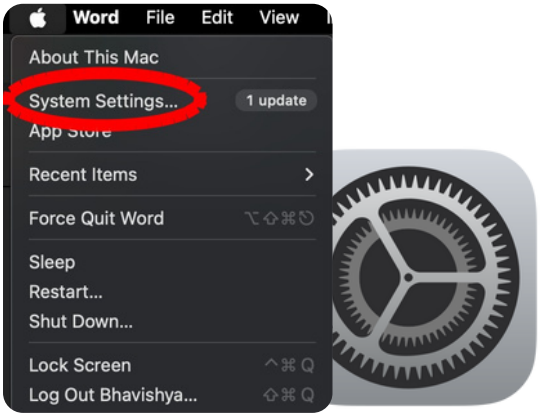
Step 2. Click System Settings.
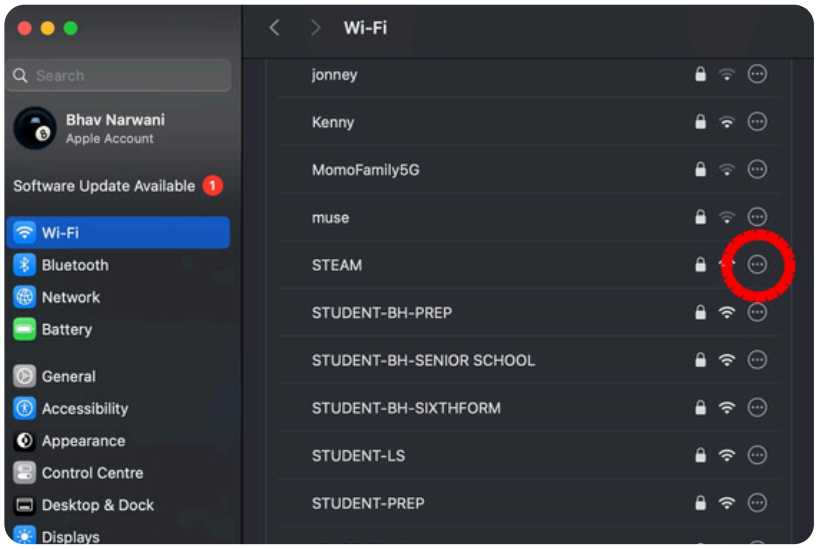
Step 3. Click Wi-Fi in the sidebar on the left.

Step 4. Find the school network in the list and click the … (three dots) button next to its name.
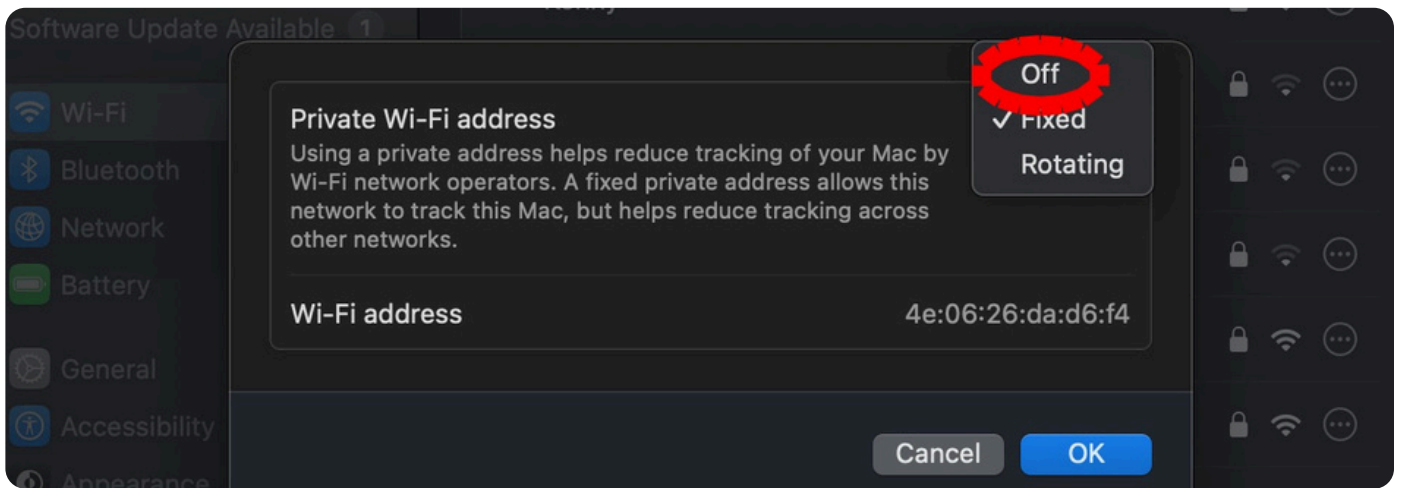
Step 5. In the menu next to Private Wi-Fi Address, choose Off, then click OK.
For iPhone and iPad
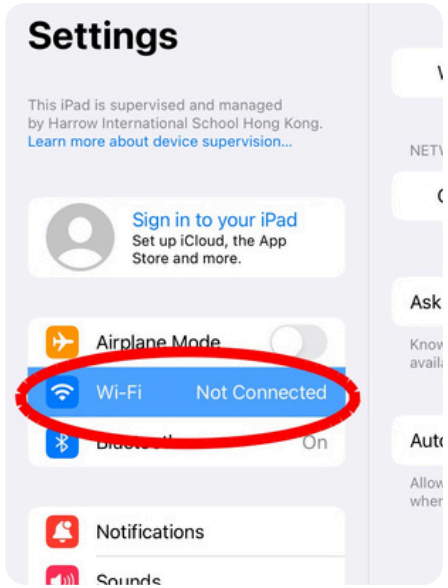
Step 1. Open the Settings app on your device.

Step 2. Tap Wi-Fi.
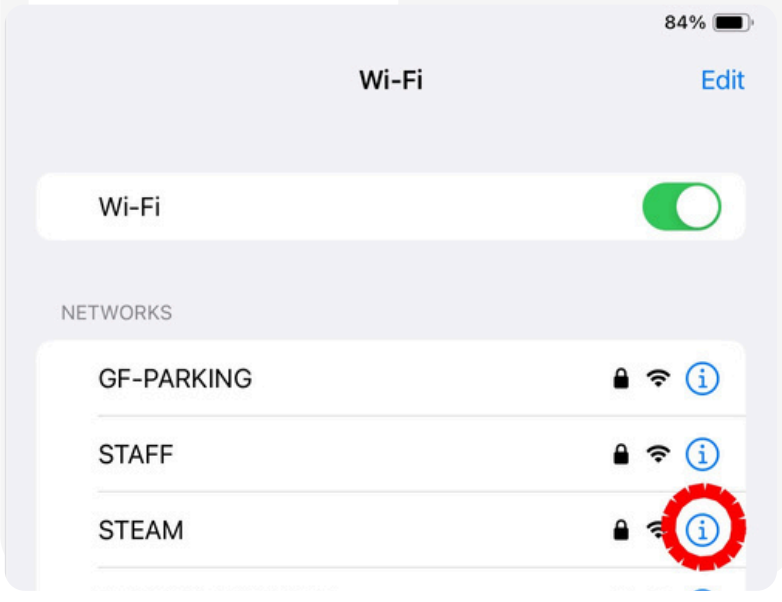
Step 3. Find the school Wi-Fi network and tap the small ⓘ (info) button next to its name.
Step 4. Configure the setting — this depends on your iOS version:
If you have iOS 18 / iPadOS 18 or later:
- Tap Private Wi-Fi Address.
- Choose Off.

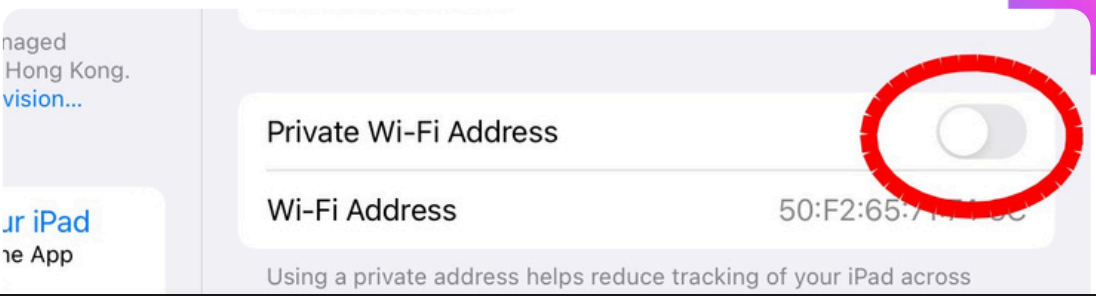
If you have iOS 17 or earlier:
- Toggle the Private Wi-Fi Address switch to the off position (so it goes from green to grey).
How to check your iOS version
Go to Settings → General → About. Look for Software Version — the first number tells you which iOS you're on (e.g. 18.x means iOS 18).
Need help?
If you've followed these steps and still can't connect to the school Wi-Fi, come and see the IT team — we're happy to help you sort it.